What is missing, however, is at what step the components are created and initialized. And it turns out, that the sequence of events is a bit more complicated if you look closer.
If you want to debug the events yourself, you’ll find that you can easily log is the way of
but if you want to stringify the whole event object, you will end up with a circular reference inside the Angular data structure, thus raising an Exception.
I only rarely check the upgrade status of my Nextcloud installation, and last time I did, I got the information
Version Nextcloud Hub 3 (25.0.13) Update Your version is up to date.
The information sound reassuring, but what worried me was that on Nextcloud’s Changelog page, the current version is shown as 28.0.0, and version 23 was already out of support.
What’s going on here?
Well, the release announcement for Hub 4 mentions that “This release supports the latest PHP 8.2”, but it does not indicate that it would no longer run on PHP 7, which is default for Ubuntu 20.04, or that you are strongly encouraged to upgrade your PHP version to be able to install current and future upgrades.
My wishlist regarding the version check would certainly contain:
If the installed version is unsupported, deprecated, obsolete, out-of-use, then please say so.
If an upgrade can only be performed if a newer version of some underlying software needs to be installed (PHP 8 instead of PHP 7.4), then please say so.
Anyway, I proceeded with the Ubuntu upgrade:
$ sudo apt-get update
$ sudo apt-get upgrade
$ sudo apt-get dist-upgrade
$ sudo do-release-upgrade -c
Checking for a new Ubuntu release
New release '22.04.3 LTS' available.
Run 'do-release-upgrade' to upgrade to it.
$ sudo do-release-upgrade
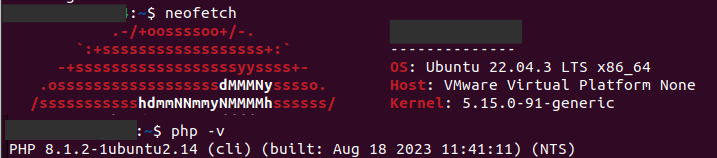
After the upgrade completed, I was on Ubuntu 22.04 and PHP 8.1:
However, the Nextcloud website could not be reached:
Internal Server Error

The server encountered an internal error and was unable to complete your request.
Please contact the server administrator if this error reappears multiple times, please include the technical details below in your report.
More details can be found in the server log.
I found that useful error messages can be found in the Apache error.log as configured in the website’s config file, and as result of the php occ command.
A couple of errors were to fix: First, disable the php7.4 module and enable the php8.1 module. (One would think that upgrading PHP through the Ubuntu upgrade would also re-wire the Apache modules accordingly)
$ sudo a2dismod php7.4
Module php7.4 disabled.
$ sudo a2enmod php8.1
Enabling module php8.1.
To activate the new configuration, you need to run:
systemctl restart apache2
$ sudo systemctl restart apache2
The PHP upgrade apparently also did not upgrade the previously installed modules, as php occ tells me:
$ sudo php occ
An unhandled exception has been thrown:
Doctrine\DBAL\Exception: Failed to connect to the database: An exception occurred in the driver: could not find driver in /var/www/html/nextcloud/lib/private/DB/Connection.php:139
Stack trace:
#0 /var/www/html/nextcloud/3rdparty/doctrine/dbal/src/Connection.php(1519): OC\DB\Connection->connect()
Please dear computer let PHP connect to MariaDB:
$ sudo apt-get install php-mysqli
Reading package lists… Done
Building dependency tree… Done
Reading state information… Done
Note, selecting 'php8.1-mysql' instead of 'php-mysqli'
Please dear Nextcloud, will you run?
$ sudo php occ
An unhandled exception has been thrown:
Error: Call to undefined function simplexml_load_string() in /var/www/html/nextcloud/lib/private/App/InfoParser.php:69

$ sudo apt-get install php-xml
Fixing database access and XML parsing, we reached the next level in the occ text adventure:
$ sudo -u www-data php occ
PHP module zip not installed.
Please ask your server administrator to install the module.
PHP module mbstring not installed.
Please ask your server administrator to install the module.
PHP module GD not installed.
Please ask your server administrator to install the module.
PHP module cURL not installed.
Please ask your server administrator to install the module.
Whatever happened to Anki, which I had installed many major versions of Ubuntu ago, and which I only rarely use – it only started up with an empty screen today.
So I went to the Download Anki page, und downloaded the latest version (2.1.66), both for Qt5 and Qt6 to find a way to make it run again. Advantage: you can then start Anki with a simple ‘./anki‘ from the terminal without installing it.
I followed all the “you might be missing this” instructions for missing libraries, but still no luck with displaying anything but an empty start window (either grey or black, depending on the Qt version).
After going through the AnkiWeb forums, I found twohints that finally produced a functioning Anki window in Qt5:
After repeatedly verifying the successful application launch, I installed this Qt5 version using ‘./install.sh‘, and used the Menu Editor to set the parameters.
Which of course would not work the way I intended.
So the parameters had to go to a shell script which I created using
$ echo QTWEBENGINE_CHROMIUM_FLAGS="--no-sandbox" DISABLE_QT5_COMPAT=1 anki > start-anki.sh
and used Menu Editor again to replace the original Command with
This bug was really annoying: You type an email in Evolution mailer and send it successfully, and the next time you start up Evolution again, you get that dialog
Do you want to recover unfinished messages?
and you are not sure whether you sent everything you wanted to send, and dare not press the Discard button, and end up with all the emails written since the last time you started the mailer.
Well, it happened again today, and I was more successful in tracking the bug down, and found 2 bug reports on Launchpad
I have a couple of shell scripts that I run regularly, and currently they reside in a ~/Tasks directory. This means there is always an open window (Terminal or Files) so that I can invoke them easily (after finding this window).
I had this idea that somehow it should be possible to add a Tasks folders to the Applications menu, and call the script from menu items inside Applications, allowing for faster access.
So now I found this answer on AskUbuntu refering to a utility called menulibre, so I quickly installed it using
sudo apt install menulibre
and started it and indeed. it allowed me to add a Tasks folder (called “Directory” in menulibre) and various menu items (called “Launchers”, what would be “shortcuts” in windows) inside it.
Since these are file-based operations, you need to save every single item after editing it – apparently there is no “Save All” mechanism.
Under the hood, the application creates a menulibre-[name].directory file in ~/.local/share/desktop-directories for each directory, and menulibre-[name].desktop files for each item in ~/.gnome/apps and ~./local/share/applications.
The homepage of menulibre is here, and its repository can be found on GitHub.
I am not sure whether you can confirm a data directory for PostgreSQL during Ubuntu installation, but anyway, I ended up with the data directory located in the default location.
For some database experiments that I expect to be quite harddisk-consuming, I want to PostgreSQL to store this database on a different volume.
I needed to check my Angular application for data consistency. Those checks included completeness of internally referenced data, as well as the existence of files referenced by file name in that data.
Since Angular is TypeScript, it would be nice to use TypeScript for those checks, as I can directly reference all types and data declared in the application code using the import mechanism.
(I had previously used gulp for such tasks, but used JavaScript at that time. Apparently, there also exists a way to integrate gulp with TypeScript)
To run a TypeScript from the command line, I installed ts-node as a dev dependency in my Angular application:
npm i -D ts-node
However, running the script using
npx ts-node path-to-script.ts
would raise the error message
(node:1060467) Warning: To load an ES module, set “type”: “module” in the package.json or use the .mjs extension. (Use node --trace-warnings ... to show where the warning was created)
Fortunately, this issue was quite easy to resolve thanks to this SO comment, as I only needed to edit tsconfig.json to add the following configuration to the JSON root:
I have an HP Envy 5030, and printing from Ubuntu (22.04, but also earlier versions) works fine, both via Windows Shared Printer and directly via USB.
Scanning, however, has always been a problem, as Ubuntu’s Document Scanner always crashed with the message
simple-scan crashed with SIGSEGV in _IO_new_fclose()
Scanning from the HP Device Manager also starts Document Scanner, so that’s option, and running hp-uiscan can’t find the scanner (“No device connected”).
Search through online forums, I found mention of XSane, and searching for XSane I found the Ubuntu page on XSane, stating
XSane can also be used from within The GIMP; just click
Before I upgraded to Ubuntu 22.04 (Jammy), I had dotnet 5 and 6 installed, rather out of interest, than doing any serious programming.
As far as I can remember, I originally had installed the Snap version of dotnet, but had troubles installing any dotnet packages or templates, so I had switched to the “native” version of dotnet, probably using the dotnet-install.sh variant – I’m not sure.
Upgrading to 22.04 seems to have uninstalled dotnet 5, as it is out of support, and weird things happened to the dotnet 6 installation: